
OCTOBER ONLY: 35% OFF
APS IS OFFERING 35% OFF ALL ITEMS GET YOUR QUOTE NOW
APS IS OFFERING 35% OFF ALL ITEMS GET YOUR QUOTE NOW

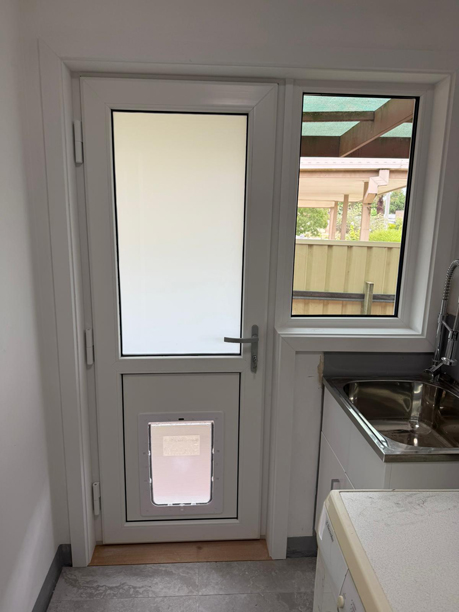
Measuring a door for replacement sounds like a five-minute job. Get out the tape measure, check the height and width, done. In practice, it’s one of those tasks where small errors create expensive problems: a door ordered at the wrong size, a frame that doesn’t fit the opening, or a slab that’s right in one dimension and wrong in another. The stakes are real: replacement doors are typically non-returnable once manufactured, particularly custom or semi-custom sizes.
The most important thing to understand before you start is that “measuring the door” means something different depending on what’s being replaced. Getting this distinction right before you take a single measurement will determine whether the process is straightforward or frustrating.
If you’re still deciding on the door itself before measuring, our guides to double glazed front and entrance doors and double glazed French doors cover the options in detail — useful reading before you commit to a product, since the door type and frame configuration can affect how you approach the measurement process.
There are three distinct scenarios, and each requires a different measurement approach.
The confusion that causes most measurement mistakes is treating these three scenarios as if they were the same. They’re not. Keep the scenario you’re in firmly in mind as you work through the steps below.
Having the right tools before you start and knowing how to record your measurements correctly can help prevent the most common sources of error.
A metal tape measure is essential — fabric or plastic tapes can flex and give inaccurate readings, particularly over larger spans. You’ll also want a notepad or phone to record everything, a pencil or chalk to mark reference points, a torch if the area is poorly lit, and, ideally, a helper to hold the tape on large doors.
A spirit level is useful for checking that the frame is plumb. A builder’s square helps check corners. A camera — your phone is fine — should be used throughout. Photos of the existing door, frame, and opening provide backup if questions arise later.
Record all measurements in millimetres. This is standard practice in Australian building and joinery, and it eliminates the confusion that can arise with mixed centimetre/inch notation.
If the replacement door is part of a wider renovation, it also helps to think beyond measurements and consider how the new door will sit alongside your windows, glazing, and overall design choices. This guide to choosing the right double glazed windows and doors for your home renovation may help ensure each element works together both practically and visually.
If the frame is in good condition and you’re replacing only the door itself, measuring the slab directly is the most reliable starting point. An existing door that fits correctly is your best template.
Measure across the face of the door at three points — top, middle, and bottom. Record all three. Ideally, they’ll be the same. If there’s a variation of more than a few millimetres, note this as it may indicate the door has warped or been trimmed over time.
Measure from top to bottom at three points — left edge, centre, and right edge. Again, record all three. Height variation can indicate settling or a non-parallel frame.
Measure the door’s thickness at the edge. Standard internal doors in Australia are typically 35 mm. External doors are commonly 40 mm or 45 mm. Confirm what you have rather than assuming.
Stand inside the room that the door swings into. If the hinges are on the left, it’s a left-hand swing. If the hinges are on the right, it’s a right-hand swing. Manufacturers need this to correctly position the lock bore, latch, and sometimes the weatherstripping.
When the three width measurements differ, use the most representative figure — typically the middle measurement — and note the variation for your supplier. Don’t assume the smallest is safest without understanding why there’s variation. If the slab has been trimmed, the smallest dimension may represent an intentional adjustment rather than the frame dimension.
When you’re replacing both the door and frame as a unit, or when the existing door is gone but the frame is staying, you measure inside the frame opening.
Measure across the inside of the frame — from jamb face to jamb face — at three points: near the top, at mid-height, and near the bottom. Record all three.
Measure from the top of the frame (or the underside of the head jamb) down to the floor at three points — left, centre, and right. Record all three.
Here’s a critical point to keep in mind: when measuring inside a frame to understand what door will fit, use the smallest width and the smallest height. This tells you the limiting dimension — the tightest point the door needs to pass through. A door that fits the smallest dimension will fit everywhere. A door sized to the largest dimension may bind at the tightest point.
Jamb depth is the distance from the front to the back of the frame. It determines whether a replacement doorset fits flush with both wall faces. Measure the depth of the existing jamb. In Australian homes, this varies by wall construction type — stud-frame walls, brick veneer, and double-brick walls each have different jamb depth requirements.
If flooring is being replaced or installed after the door, you need to account for its finished height. A new 12 mm tile or a thick carpet pad can significantly reduce the clearance under the door. If in doubt, measure to the subfloor and note what floor finish will be installed.
When a frame is being removed, or you’re measuring a new opening, you’re measuring the structural void — the space between studs in a timber-frame wall, or the masonry opening in a brick or block wall.
Measure the rough opening width at the top, middle, and bottom. The smallest measurement is your controlling dimension.
Measure from the structural sill or floor to the underside of the lintel at three points. The smallest measurement is your controlling dimension here, too.
Measure the two diagonals of the opening — from the top-left corner to the bottom-right, and from the top-right corner to the bottom-left. If these measurements are equal, the opening is square. If they differ by more than 10–15 mm, the opening is out of square and should be noted specifically when ordering. A doorset installed in a significantly out-of-square opening will either not close properly or leave uneven gaps.
Measure the brick-to-brick or block-to-block width at multiple points. Masonry openings may taper slightly if the brickwork has settled unevenly, so measuring at three points is important.
The rough opening size is not the same as the order size. Most doorsets are manufactured with a specified installation gap — typically 10–15 mm on each side and at the top — to allow for shimming and squaring during installation. Your supplier will advise the specific allowance for their product. Don’t guess at this; ask.
Understanding why your measured dimension isn’t your order dimension saves a lot of confusion.
A door slab that’s being ordered to replace one that already fits should be ordered at the same measured size, minus any specific adjustments discussed with your supplier.
A doorset ordered to fit inside a frame should be slightly smaller than the frame opening — usually 3–5 mm narrower and taller — to allow the door to swing freely without binding, while still sealing properly when closed.
A doorset or frame ordered to fit a rough structural opening should be ordered per the manufacturer’s specified formula, which typically deducts the manufacturer’s installation allowance from the rough opening dimensions.
Confusion often arises when a single rule is applied across all three scenarios. The answer to “Should I use the smallest or largest measurement?” depends entirely on what you’re measuring and what you’re ordering it into.
Even in straightforward installations, several practical factors can affect your measurements. Here are the most common ones to look out for:
Many older Australian homes — particularly pre-1980 brick veneer or weatherboard homes — have settled unevenly over decades. If the floor isn’t level across the width of the opening, your bottom clearance will be uneven. Measure floor-to-frame at both sides and note the difference.
Before deciding to keep an existing frame, inspect it properly. Rotten bottom corners on timber frames — especially on external doors — are common and are often hidden behind door stops or weatherstripping. A frame that looks acceptable may not square up properly once the door is removed.
In older homes, the thickness of plaster or render around the frame can affect how a replacement doorset sits relative to the wall face. If you’re replacing a full doorset, measure the wall thickness, including all finishes, to confirm the jamb depth you need.
External door replacements require careful consideration of the threshold or sill. The sill slope, drainage direction, weatherproofing, and whether the internal and external floor levels are matched all affect what threshold design will work. Measure sill width and note whether the existing sill will be reused or replaced.
Small errors in the measurement process are the most common cause of poorly fitting replacement doors. Here are the mistakes that come up most often:
• Measuring the trim or architrave rather than the structural opening: Architraves can be thick — 60 to 90 mm wide — and if you measure from outer trim edge to outer trim edge, you’re not measuring the opening at all.
• Assuming a standard size will fit without measuring: Australia has common door sizes — 820 mm x 2040 mm is a very common internal door size, and 870 mm x 2040 mm is common for external doors. However, older homes, especially, may have non-standard openings built to the materials available at the time.
• Not recording swing direction: It seems obvious until you’re placing an order and realise you’ve only written down dimensions without confirming left-hand or right-hand swing.
• Measuring before the floor is finished: If carpet, tiles, or timber flooring is being laid after the door is installed, the effective height of the opening and the bottom clearance both change. Account for finished floor height before confirming your measurements.
• Relying on one measurement per dimension: Openings are rarely perfectly parallel or square, and a single measurement may catch the widest or narrowest point by chance rather than representing the actual condition.
When you contact your door supplier or installer with measurements, have the following ready:
A professional supplier will almost always want to confirm measurements on-site before manufacturing a custom door. This is standard practice and worth accepting, particularly for external doors or non-standard sizes where the cost of an error is high.
Accurate door measurement comes down to one foundational decision — understanding what you’re replacing and, therefore, what you need to measure — and then carefully executing the measurement process across multiple points rather than relying on a single dimension.
Use the existing slab as your template when it fits correctly. Use the smallest inside-frame dimension when ordering a door to fit a frame. Use diagonal measurements to check squareness when replacing a full frame. Record everything, take photographs, and when in doubt, let an experienced supplier or installer verify your figures before anything is manufactured.
The few extra minutes this process takes up front are the difference between a replacement door that fits the first time and an expensive mistake.
It depends on what you’re replacing. To replace only the door slab, measure the existing door. To replace a door within an existing frame, measure the inside of the frame. To replace both the frame and door, measure the structural rough opening. Using the wrong reference point is the most common source of measurement errors.
When measuring an existing door slab that fits correctly, use the actual slab dimensions. When measuring inside a frame to understand what door will fit, use the smallest dimension — that’s the limiting size. When measuring a rough opening for a new doorset, use the smallest dimension and apply the manufacturer’s installation allowance.
Stand inside the room that the door swings into. If the hinges are on your left, it’s a left-hand swing. If the hinges are on your right, it’s a right-hand swing. This affects the hinge and lock position in the new door.
Measure the two diagonals of the opening — from top-left to bottom-right, and from top-right to bottom-left. If they’re equal, the opening is square. If they differ significantly, the opening is out of square, and your supplier needs to know before manufacturing.
Common internal door sizes include 820 mm wide by 2040 mm high. Common external door sizes include 870 mm wide by 2040 mm high. However, older homes frequently have non-standard openings. Always measure; never assume.
Yes. If new carpet, tiles, or timber flooring will be installed after the door, the finished floor level will be higher than the subfloor. Measure to the subfloor and note the expected floor finish thickness so the bottom clearance under the door is calculated correctly.
Jamb depth is the front-to-back dimension of the door frame — how deep the frame is from one wall face to the other. It needs to match the wall thickness so the frame sits flush on both sides. This dimension varies between wall construction types, particularly in older Australian homes.
For external doors, custom-sized doors, doors in older homes with out-of-square openings, or any situation where both the frame and the structural opening are being replaced, professional measurement before manufacturing is worth arranging. The cost of an incorrectly sized custom door almost always exceeds that of having an experienced person properly measure the opening.